

Table of Contents
- Understanding the Basics of Ball Mill Operation and Uses
- Essential Materials and Tools Needed for a Homemade Ball Mill
- Step-by-Step Instructions to Assemble Your DIY Ball Mill
- Choosing the Right Grinding Media and Jars for Optimal Performance
- Safety Tips and Best Practices for Operating a Homemade Ball Mill
- Frequently Asked Questions
- What materials are best for constructing a ball mill drum?
- What type of grinding media should I use in a DIY ball mill?
- How critical is the rotational speed when building a ball mill?
- What motor specifications are required for an effective homemade ball mill?
- How do I ensure safety when operating a DIY ball mill?
- Can I use a repurposed paint shaker or mixer to build a ball mill?
- What is the optimal fill ratio for grinding media and material in a ball mill?
- How do I prevent contamination during milling?
- Is a cooling system necessary for a homemade ball mill?
- How do I seal the drum to prevent leaks and contamination?
- What software or tools help optimize ball mill design?
- What post-processing steps improve results from a ball mill?
Transforming raw materials into finely ground powders has never been more accessible—thanks to the ball mill, a cornerstone tool in chemistry, metallurgy, and materials science. While commercial models can be costly and complex, building your own ball mill offers a cost-effective, customizable solution for hobbyists, researchers, and DIY enthusiasts alike. This comprehensive guide walks you through every step of constructing a reliable, high-performance ball mill from readily available components, ensuring precision and safety throughout the process. From selecting the optimal motor and constructing a robust drum to choosing grinding media and balancing rotational speed, we cover the engineering principles and practical insights that turn theory into tangible results. Whether you’re processing chemicals for pyrotechnics, refining pigments, or experimenting with nanomaterials, a homemade ball mill empowers you to achieve consistent, professional-grade grinding. Discover how a blend of mechanical know-how and scientific understanding can unlock new possibilities in your workshop—efficiently, affordably, and safely.
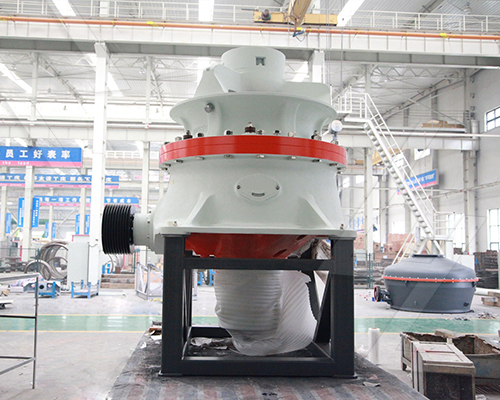
Understanding the Basics of Ball Mill Operation and Uses
-
A ball mill is a rotating cylindrical vessel that uses grinding media—typically steel, ceramic, or flint balls—to reduce materials into fine powders through impact and attrition. Its operation relies on the transfer of kinetic energy from the rotating motion to the grinding media, which in turn fractures particles within the feed material.
-
The cylinder, partially filled with grinding media and material to be ground, rotates on its axis. As it turns, the media and material are lifted to a height before cascading down, creating both crushing and shearing forces. Critical operational parameters include rotational speed, media size and density, fill level, and grinding duration. Optimal speed, often 65–85% of critical speed (the point at which media centrifuge against the wall), ensures effective tumbling action.
-
Ball mills are used across industries for blending, grinding, and reducing particle size in materials such as ores, ceramics, chemicals, and pyrotechnic compositions. In DIY applications, they are especially valuable for homogenizing reactive chemical mixtures or producing fine metal or oxide powders. Their versatility allows processing both dry and wet materials, with wet grinding often preferred for finer particle dispersion and reduced dust.
-
The choice of grinding media depends on material compatibility and desired purity. Steel media offer high impact energy but risk contamination in reactive mixtures; ceramic or flint balls are inert and suitable for chemical applications. Mill lining materials must also resist abrasion and chemical attack—common choices include rubber, stainless steel, or high-alumina ceramic.
| Factor | Impact on Grinding Efficiency |
|---|---|
| Media Size | Smaller media increase surface contact for fine grinding; larger media enhance impact for coarse reduction |
| Fill Ratio | 30–45% media and material combined maximizes efficiency; overfilling reduces tumbling action |
| Rotation Speed | Too low reduces impact; too high causes centrifuging, halting effective grinding |
| Grinding Time | Longer durations yield finer particles but risk overheating or contamination |
- Safety and precision are paramount. Sealed systems prevent volatile or toxic dust release, while consistent rotation ensures uniform particle size distribution. For DIY construction, robust sealing, balanced rotation, and non-sparking materials are essential, particularly when processing sensitive compounds.
Essential Materials and Tools Needed for a Homemade Ball Mill
- High-quality stainless steel or heavy-walled carbon steel cylindrical drum (minimum 304 SS for chemical resistance)
- Neoprene or silicone O-rings for drum sealing
- Flanged end caps with precision-machined sealing surfaces
- 1.5-inch to 3-inch diameter drum, 6 to 12 inches in length, rated for rotational stress
- Shaft made from hardened steel, center-mounted with support bearings
- Two sealed deep-groove ball bearings (rated for radial and axial loads)
- Coupling or pulley system compatible with motor output
- Variable-speed electric motor (1/3 to 1 HP, 1725 RPM base, with speed control)
- V-belt and pulley set or direct-drive coupling for torque transmission
- Robust frame constructed from steel angle or square tubing to support rotating assembly
- Safety interlock switch to prevent operation when lid is open
- Control box with on/off switch, thermal overload protection, and speed adjustment
- Grinding media: hardened steel, tungsten carbide, or yttria-stabilized zirconia balls (diameter 10–25 mm)
- Charge container liner (optional PTFE or polyurethane for material isolation)
- High-torque motor mount with vibration damping
Material selection is critical to ensure mechanical integrity and chemical compatibility. The drum must withstand repeated impact loading and potential exposure to reactive compounds. Stainless steel is preferred over mild steel due to superior corrosion resistance and durability. For processing aggressive chemicals such as perchlorates or nitrates, avoid aluminum or zinc components.
Bearings must be shielded or sealed to prevent contamination from dust or spilled media. Position them symmetrically to minimize shaft deflection. The motor should deliver sufficient torque to rotate a fully loaded drum at 60–75% of critical speed—the point at which centrifugal force prevents cascading of media. Typical operating speed ranges from 50 to 100 RPM depending on drum diameter.
Grinding media size and material must match the target particle size and compound chemistry. Steel media may introduce contamination in pyrotechnic or electronic materials; in such cases, ceramic media are mandatory. Load media to 30–50% of drum volume for optimal impact and shear.
All electrical components must comply with local safety codes. Use grounded wiring and a GFCI-protected circuit. Mount the entire system on anti-vibration pads to reduce noise and mechanical fatigue. Include a dust-tight enclosure if processing fine or hazardous powders.
Precision in alignment—between shaft, bearings, and motor—is essential for longevity and safe operation. Misalignment accelerates wear and may lead to catastrophic failure.
Step-by-Step Instructions to Assemble Your DIY Ball Mill
-
Secure the PVC end cap to one end of the 6-inch diameter PVC pipe using PVC cement, ensuring a complete seal. Allow adequate curing time per manufacturer specifications—typically 24 hours—to guarantee structural integrity under rotational stress.
-
Position the pipe horizontally and insert the 3D-printed or machined PVC flange adapters into both ends of the cylinder. These adapters must accommodate the 1/2-inch stainless steel shaft with minimal play. Use O-rings on each adapter to ensure dust-tight sealing upon closure.
-
Slide the stainless steel shaft through the central bore of one flange, through the interior of the cylinder, and out through the opposite flange. The shaft should be precisely aligned to prevent eccentric rotation and excessive vibration.
-
Mount the two pillow block bearings on a rigid steel base plate, spaced to match the shaft length protruding from the flange assemblies. Secure the bearings with appropriate bolts, ensuring alignment is parallel and level using a precision spirit level and calipers.
-
Attach the drive pulley to one end of the shaft, outside the pillow block. The pulley must be keyed or set-screwed to prevent slippage. Mount the electric motor (recommended: 1/3 to 1/2 HP, variable speed) on the base plate, aligned so the drive belt can connect pulley to motor sheave without lateral tension.
-
Apply a high-torque silicone sealant around the outer rim of the second PVC end cap and secure it to the open end using threaded rods, wing nuts, and compression plates. Tighten uniformly in a star pattern to compress the flange seal evenly and prevent leaks during operation.
-
Load grinding media—typically 1/2-inch to 1-inch ceramic or stainless steel balls—into the mill chamber prior to final sealing. Fill volume should be 30–40% of internal capacity for optimal cascading action.
-
Connect the motor to a variable frequency drive (VFD) or speed controller to maintain rotational speed between 60–80 RPM, depending on critical speed calculations based on cylinder diameter.
-
Perform a dry run without material for 15 minutes, monitoring for vibration, seal integrity, and thermal buildup. Adjust alignment or tension as necessary.
-
After verification, introduce the material to be milled in small batches, not exceeding 20% of chamber volume, to ensure efficient particle reduction and prevent overloading.
Choosing the Right Grinding Media and Jars for Optimal Performance
Safety Tips and Best Practices for Operating a Homemade Ball Mill
- Always operate the ball mill in a well-ventilated area, preferably within a dedicated, climate-controlled workspace to minimize exposure to airborne particulates and chemical vapors.
- Wear appropriate personal protective equipment (PPE), including safety goggles, chemical-resistant gloves, and a NIOSH-approved respirator rated for fine particulates (e.g., N95 or higher), especially when loading or unloading grinding media or materials.
- Ensure the mill is securely mounted on a stable, vibration-dampening surface to prevent displacement or structural fatigue during extended operation.
- Confirm that all electrical components, including motors and power cords, are grounded and protected by a ground-fault circuit interrupter (GFCI) to prevent electrical hazards.
- Never operate the mill unattended. Continuous monitoring is essential to detect overheating, abnormal vibrations, or mechanical failure.
- Limit run cycles to intervals of 15–30 minutes followed by equal cooldown periods to prevent thermal buildup in the motor and grinding chamber. Prolonged operation increases the risk of fire, especially with reactive or flammable materials.
- Use only non-sparking grinding media (e.g., ceramic or lead-free hardened steel) appropriate for the material being processed. Avoid media that may react exothermically or produce pyrophoric dust.
- Seal the grinding chamber thoroughly using compatible gaskets and secure fasteners. Conduct a pressure test with inert gas if processing volatile compounds.
- Never grind materials known to be shock-sensitive, explosive, or self-reactive (e.g., chlorates, perchlorates, or mixtures containing ammonium nitrate) without extensive hazard analysis and remote operation protocols.
- Store raw materials and finished powders in clearly labeled, airtight containers away from ignition sources and incompatible substances.
- Clean the mill and associated tools with a damp cloth or vacuum equipped with a HEPA filter—never use compressed air, which disperses hazardous dust.
- Maintain a detailed log of materials processed, run times, and maintenance activities to support incident investigation and process optimization.
- Dispose of waste media and contaminated components according to local hazardous waste regulations.
- Educate all operators on emergency procedures, including fire suppression (Class D extinguishers for metal fires), spill containment, and evacuation protocols.
Adherence to these practices mitigates risks inherent in high-energy milling operations and ensures consistent, reproducible results while safeguarding operator health and facility integrity.
Frequently Asked Questions
What materials are best for constructing a ball mill drum?
High-carbon steel or stainless steel is ideal for the drum due to durability and resistance to wear. For less intense applications, thick-walled PVC can be used, though it’s unsuitable for prolonged high-speed or heavy-load operation. The drum must be hermetically sealable to prevent leaks and contamination.
What type of grinding media should I use in a DIY ball mill?
Use hardened steel, chrome steel, or tungsten carbide balls for ferrous materials; for non-contamination grinding, opt for ceramic (zirconia or alumina) media. Media diameter should range from 10–25 mm, with a mix of sizes optimizing surface contact and impact energy. Avoid using materials that could introduce impurities into your application.
How critical is the rotational speed when building a ball mill?
Critical. The mill should operate at 65–85% of its critical speed—the speed at which centrifugal force prevents grinding media from cascading. Critical speed (in RPM) is calculated as 42.3/√(D−d), where D is drum diameter and d is ball diameter (in meters). A variable-speed motor allows tuning for optimal grinding efficiency.
What motor specifications are required for an effective homemade ball mill?
A high-torque, low-RPM motor (typically 50–200 RPM) is essential. Use a 1/2 to 1 HP AC gearmotor with a controller for speed modulation. Direct drive or belt drive systems can transfer power efficiently; ensure structural mounting minimizes vibration-induced failure. Consider torque-limiting couplings to protect the motor.
How do I ensure safety when operating a DIY ball mill?
Always use a robust containment enclosure rated for potential rupture. Wear PPE including safety glasses, gloves, and hearing protection. Operate the mill in a well-ventilated area or under inert atmosphere if processing reactive materials. Never open the mill while in motion; use interlocks if automation is implemented.
Can I use a repurposed paint shaker or mixer to build a ball mill?
No—paint shakers lack the rotational motion and load capacity required for effective ball milling. They create vibrational motion rather than tumbling, which is ineffective for sustained particle size reduction. A true ball mill requires consistent rotary motion around its horizontal axis.
What is the optimal fill ratio for grinding media and material in a ball mill?
The total fill (media + material) should be 30–40% of the drum’s volume, with grinding media comprising about 60–70% of that fill. Overfilling reduces impact energy by limiting media movement; underfilling decreases grinding efficiency. Adjust empirically based on material hardness and desired fineness.
How do I prevent contamination during milling?
Use grinding media and drum linings compatible with your material—e.g., ceramic or polyurethane for avoiding metallic contamination. Purge the chamber with inert gas (like argon) when processing oxidation-sensitive compounds. Clean the mill thoroughly between runs using appropriate solvents or ultrasonic cleaning.
Is a cooling system necessary for a homemade ball mill?
For prolonged runs (>30 minutes) or heat-sensitive materials, yes. Integrate water cooling via an external jacket or cooling coils around the drum. Monitor temperature with a thermocouple; exceedance of 60–80°C can degrade samples or damage seals. Intermittent operation with cooling pauses is an alternative.
How do I seal the drum to prevent leaks and contamination?
Use precision-machined flanges with recessed O-rings made from Viton or silicone, clamped securely with bolts or a bayonet system. Apply thread sealant on joints and test under pressure before use. For high vacuum or inert gas environments, employ double O-rings with vented monitoring ports.
What software or tools help optimize ball mill design?
Use CAD software (e.g., Fusion 360) for modeling mechanical stress and balance. Calculate critical speed, power draw, and residence time with spreadsheets using Bond Work Index formulas. Finite Element Analysis (FEA) tools can verify structural integrity under operational loads.
What post-processing steps improve results from a ball mill?
Sieve the output through precision mesh (e.g., 200 mesh) to remove oversized particles. Use air classification or sedimentation for narrow particle size distribution. For nanomaterials, consider ultrasonic dispersion to break agglomerates post-milling.